Are you about to hang your TV on the wall to transform your room into an awesome movie theater? Mounting a TV can bring this vision to life, but it requires more effort than taping up a picture. You must plan carefully, gather the right tools, and prioritize safety to ensure your TV stays secure and your walls remain undamaged. Whether you are new to DIY projects or experienced handyman with tools, this guide covers everything from locating hidden wires and pipes to selecting the perfect mount and installing it professionally.
Before you start drilling holes in your wall, you need to make sure there are no hidden wires or pipes behind it. Drilling into them could cause:
For stud finder, find wooden studs (the strong parts of the wall). Some can also detect wires and pipes.
Once you know where it’s safe to drill, you can move on to picking the right mount.
Not all TV mounts are the same. You need one that fits:
Mount Type | Best For | Pros | Cons |
Fixed Mount | Simple, low-cost setup | Cheap, sleek look | Can’t tilt or adjust |
Tilting Mount | TVs above eye level (like over a fireplace) | Reduces glare | Can’t swivel side-to-side |
Full-Motion Mount | Flexible viewing (tilt, swivel, pull out) | Best for big rooms | More expensive |
Ceiling Mount | Small spaces (kitchens, gyms) | Saves wall space | Harder to install |
Once you have the right mount, gather your tools.
Before starting your TV mounting project, it’s important to collect all the necessary tools and have them within easy reach. A well-prepared workspace makes the job much smoother and safer.
1. Power Drill (with Bits)
A power drill is essential for creating holes in your wall to secure the TV mount. Without it, you won’t be able to anchor the mount properly. A cordless drill (such as DeWalt or Makita) offers better maneuverability. For bits, use a 3/16″ wood drill bit for studs, a 1/4″ masonry bit for brick/concrete, and a 1/2″ drywall bit if using anchors.
2. Stud Finder
A stud finder helps locate wooden studs behind drywall, which are the strongest points to mount your TV. Hitting a stud ensures maximum stability. An electronic stud finder (like Zircon MultiScanner or Bosch GMS120) is more accurate and can also detect hidden wires and pipes for safety.
3. Tape Measure
A tape measure ensures precise placement of your TV. You’ll need it to measure the correct height (typically 40-48 inches from the floor to the center of the screen) and stud spacing (usually 16 or 24 inches apart). A 25-foot retractable tape measure (Stanley or Komelon) is durable and easy to use.
4. Level (24″ or Laser Level)
A level guarantees your TV mount is perfectly straight. A crooked TV isn’t just annoying—it can also strain the mount over time. A 24-inch bubble level (Empire or Johnson) is reliable, but a laser level (like Bosch GLL30) provides even more precision.
5. Screwdriver (Phillips Head) & Socket Wrench
A Phillips screwdriver tightens most TV mount screws, while a socket wrench secures heavy-duty bolts. A magnetic screwdriver (Klein Tools) prevents dropped screws, and a ratcheting socket wrench (Craftsman) makes tightening easier.
6. Pencil & Painter’s Tape
A pencil marks drill points, and painter’s tape helps label stud locations without damaging walls. A mechanical pencil stays sharp, and ScotchBlue painter’s tape removes cleanly.
7. Wall Anchors (SnapToggle, EZ Ancor, or Molly Bolts)
If no studs are available, wall anchors provide strong support for your TV mount in drywall. SnapToggle anchors (for heavy TVs) or EZ Ancor self-drilling anchors (for easier installation).
8. Wire Management Kit (Cable Raceway or In-Wall Kit)
A Wire management kit hides messy cables for a clean, professional look. A plastic raceway (D-Line or CableOrganizer) is easy to install, while an in-wall cable kit (Legrand) offers the sleekest finish.
9. Anti-Tip Strap (Safety Strap)
An anti-tip strap prevents TVs from falling, especially in homes with kids or pets. The Safety 1st TV Strap or ECHOGEAR Anti-Tip Kit provides extra security.
10. Flashlight or Inspection Camera
A flashlight helps you see inside walls for hidden wires or pipes before drilling.
A LED work light (Neiko or Streamlight) or a borescope inspection camera (Depstech) for tricky spots.
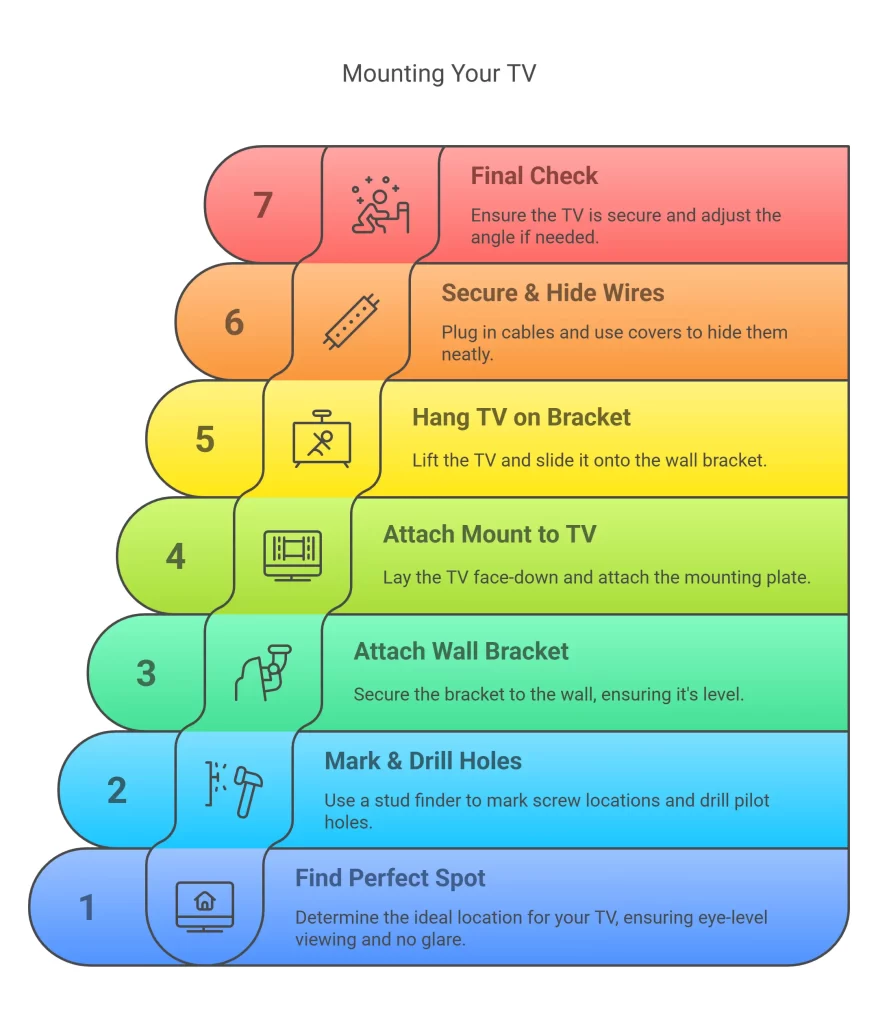
1. Find the Perfect Spot
2. Mark & Drill Holes
3. Attach the Wall Bracket
4. Attach the Mount to the TV
5. Hang the TV on the Bracket
6. Secure & Hide Wires
7. Final Check
While mounting a TV can be a satisfying DIY project, professional installation may be preferable for complex setups like plaster/concrete walls, oversized/premium TVs (75″+), above-fireplace installations, or commercial spaces where perfect alignment and hidden wiring matter. Many UAE retailers and smart home maintenance services offer mounting starting around AED 150-300 (basic) to AED 250-450 (with in-wall cable concealment), often including hardware, tools, and workmanship guarantees, with some even bundling installation when purchasing a new TV for a hassle-free experience.
Habitatlux is the best home maintenance service company in Dubai, offering 24/7 expert repair and maintenance job for homes, property and offices.
info@habitatlux.ae
Mon - Sun 08:00am - 05:00pm
Mob: 050 359 0810
Unit 13 Sheikh Zayed Road - Al Quoz 1 - Dubai